How to archive and publish data on TUDatalib
Content
When publishing an article or reaching a milestone with your project, it makes sense (or might be mandatory) to organize and store your data. It is much faster to compare results when they do not have to be computed again just for this purpose.
Find more information on the TUDatalib home-page. In addition to the instructions below, please also mind the FAQs, as well as the detailed guide (actually for administrators), both of which can be found here for german or here for english.
Structure of TUdatalib
In TUDatalib, content is organized in Collections: a set of data items with a common title.
For example, a scientific article may have a collection with the title of the article, and different data sets from the results section.
Alternatively, a collection can be a scientific study, that contains different data sets.
A collection is not published, nor is it necessarily publicly accessible, only data items are published. Data items are basically files or, more likely, archives of files that contain data.
Step-by-step guide: archiving data
This section describes the process of archiving via the Web interface. If you have many files to upload and they are too big (currently >5 GB) to pack them in a zip-file and upload them, we recommend the use of the REST-interface, as described in the user guide.
-
Log in to TUDatalib with your ID
You will see this screen. Start with1or2. You can always access the FAQs (A).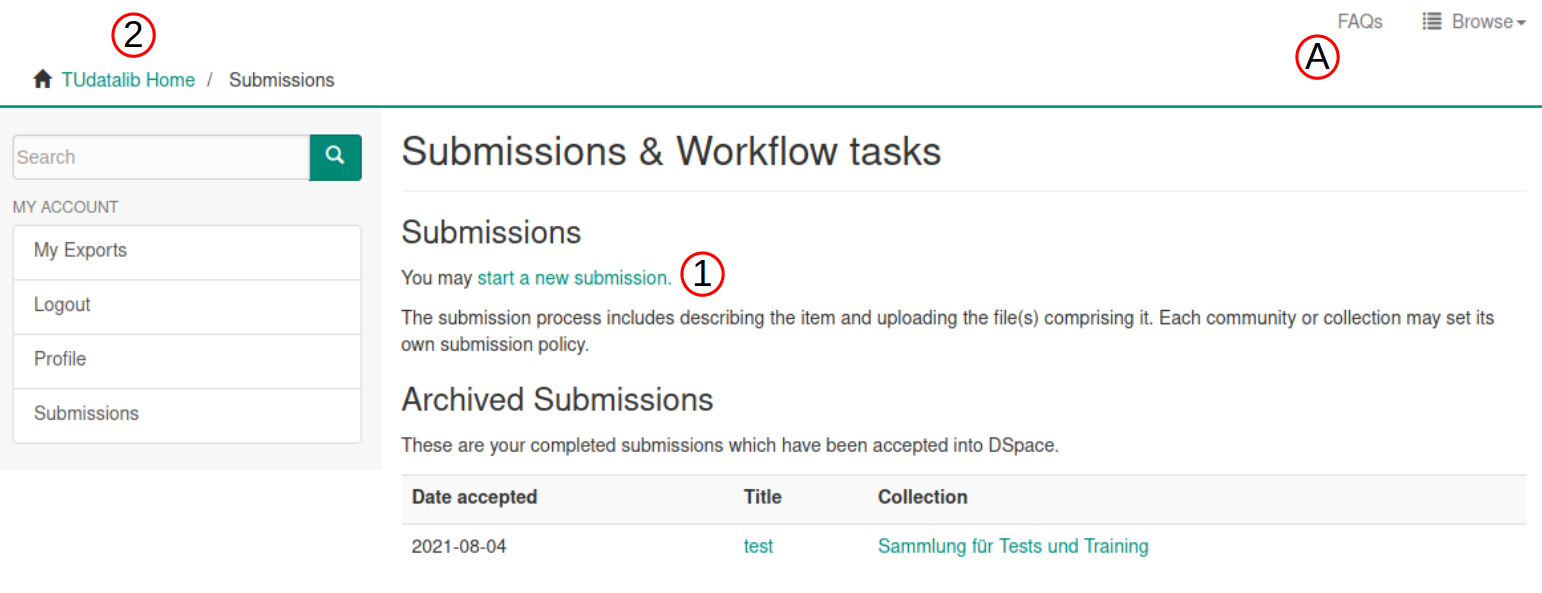
A: The FAQs
1: Shortcut for adding submissions to an existing collection you have access to. Continue with step 6.
2: Click onTUdatalib Hometo navigate to your Community (Fachbereich). Continue with step 2. -
Find your Community (Fachbereich)
After clicking onTUdatalib Home, navigate to your Community. Your path could be similar to this one:
-
Create a Collection or give somebody community administrator privileges
This step is only available to the admins of your Community.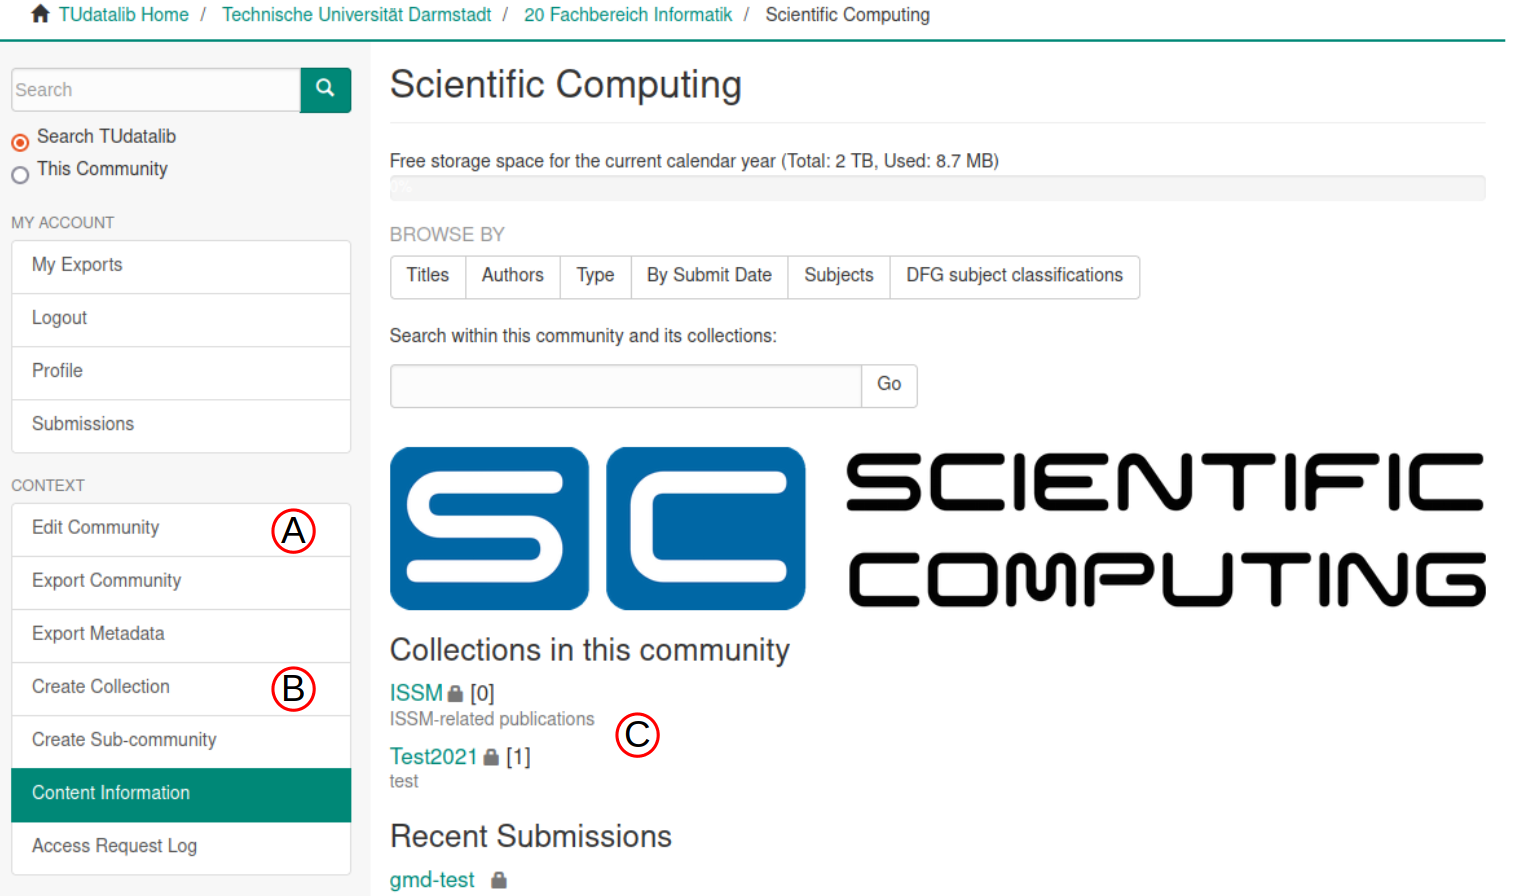
A: Edit your community e.g. give somebody else administrator privileges. This person has to already have been logged into TUDatalib.
B: Click here to create a collection.
C: Access an existing collection. -
Edit your collection
-
Navigate to your collection, if neccessary (Step 3:
C.)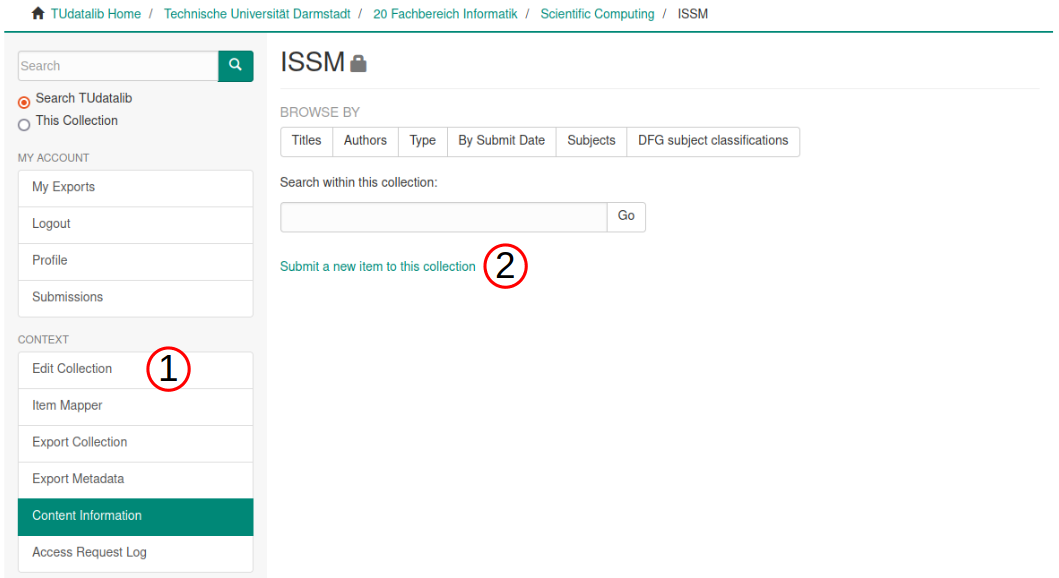
-
1: Edit your collection. We will add items (2) in the next step.
a.A: Add metadata about your collection.
b.B: Assign users to different roles.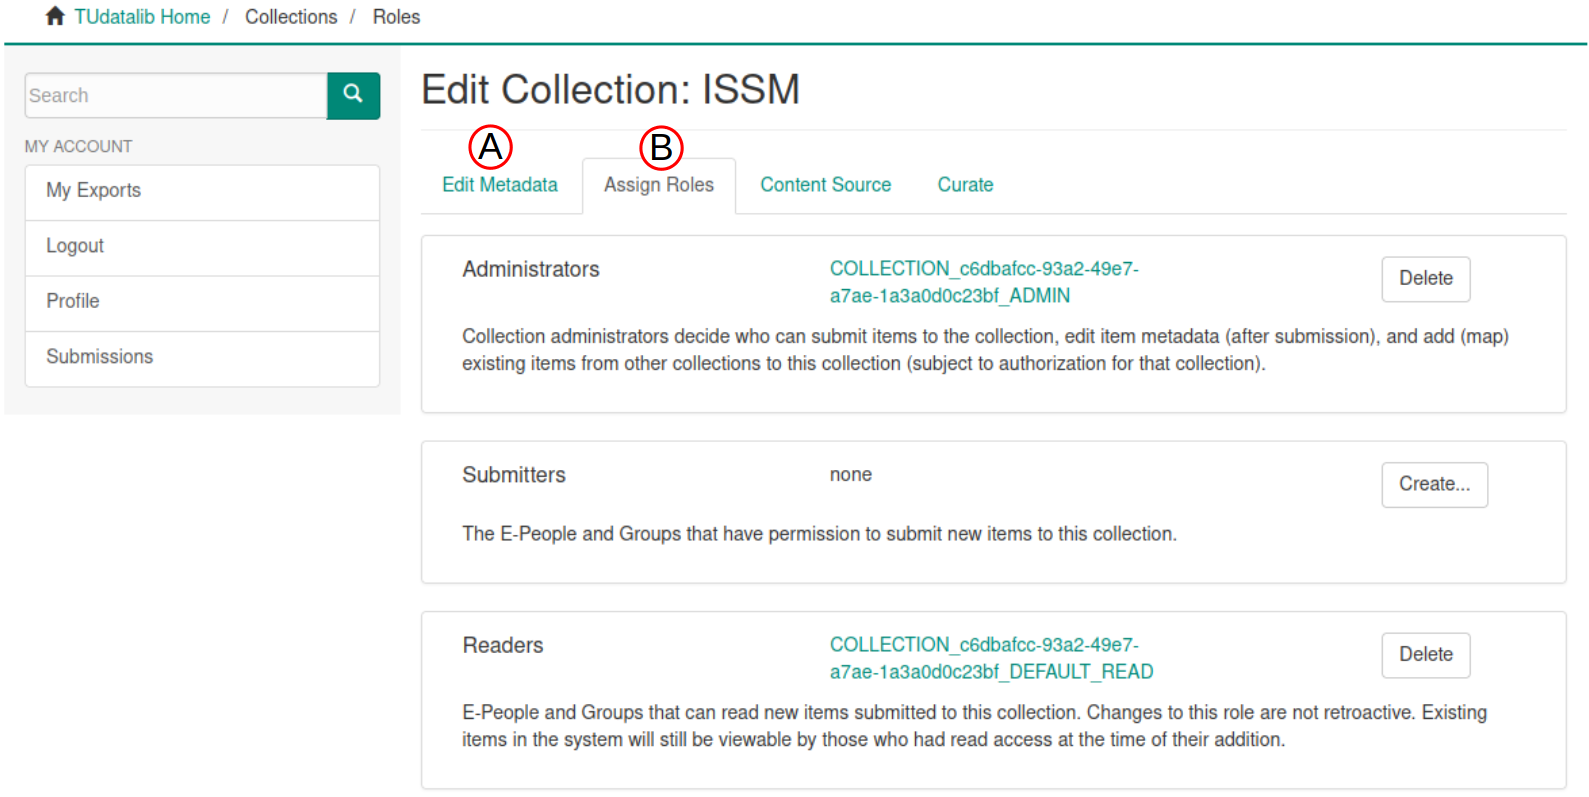
-
-
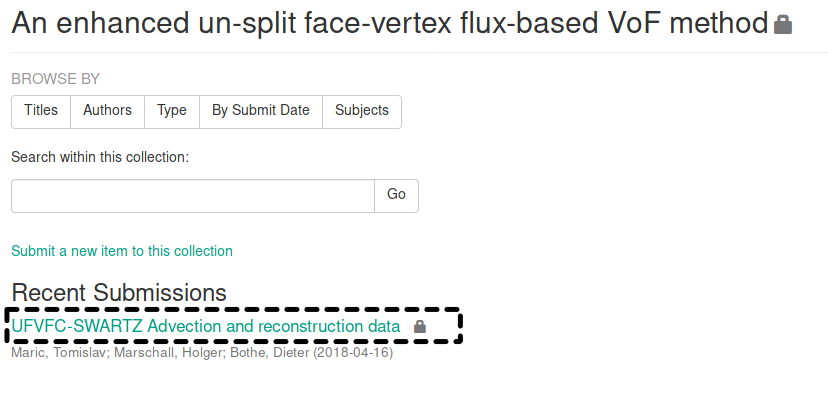
Upload data items into your collection:
Create a new data item containing one or several files. See2in the picture in step 4. -
Fill out the information about your data items
Add title, description, authors, type of content, upload date, etc.
Step-by-step guide: publishing data
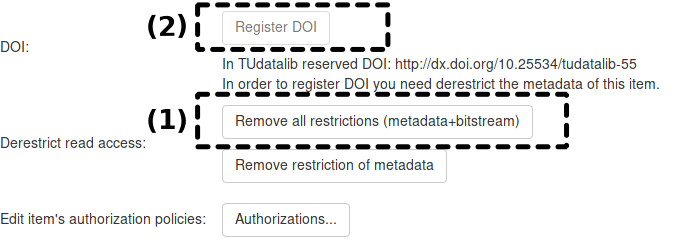
After generating a DOI you can still edit metadata, but no longer edit the files.
- Select the data item (archive you uploaded) that you want to publish
- Click on “Edit Item”
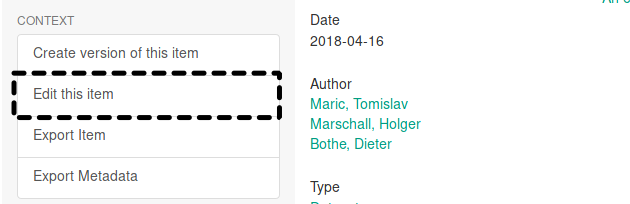
- Make the metadata and data public by removing access restrictions (
1) and register a DOI (2) that you can use in your report or article